Getting Started
This guide explains how to set up a new project using the Terrahutton Platform Package.
Project Definition
The first step is to create a Project Definition asset.
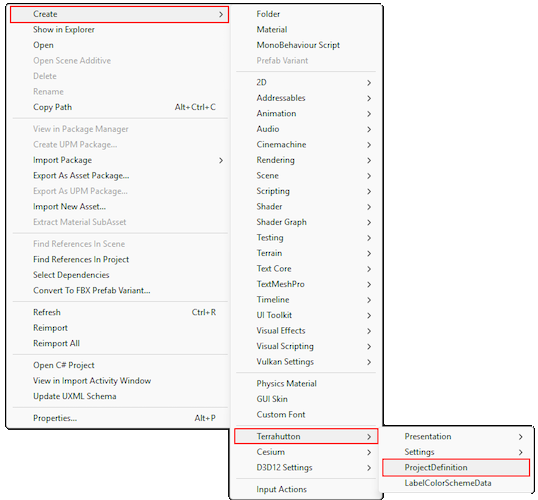
The Project Definition is a ScriptableObject that stores basic information about the project and client. To create one, use the Unity context menu:
Create -> Terrahutton -> ProjectDefinition
The Project Definition Inspector looks like this:
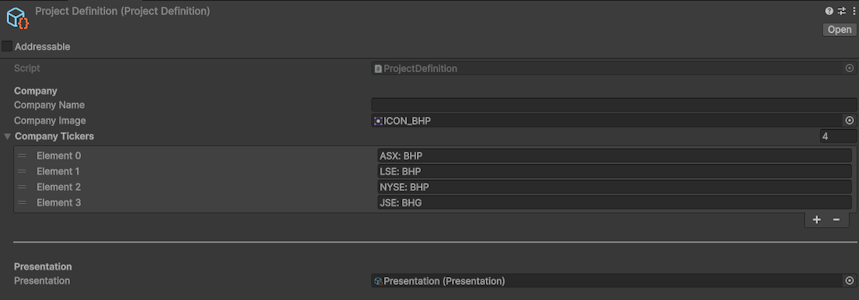
The fields are in order:
- Company Name - Used to fetch document slides from Vault. Make sure this name matches the company name used in Vault.
- Company Image
- Comapny Tickers - A string array containing the company's ticker symbols.
- Presentation Asset - The Presentation asset to be used by the project. See Presentation System Introduction
Scene Setup
Next, set up the project scene so you can begin authoring the presentation.
A good starting point is to duplicate the existing: StartScene.unity.
You can find it in the root of the Terrahutton Platform Package, usually at: Packages/com.terrahutton.platform/Scenes
The StartScene contains a few important objects and prefabs:
- VolumesAndLight - Contains scene lighting and post-processing volumes, such as the directional light and visual effect settings.
- Runtime - A prefab that contains the platform runtime services, such as
CameraDirector,CesiumService, andPresentationRuntimeService. - UI - A prefab containing the platform's screen-space UI and related behaviours
- AppConfig - Contains the
ProjectDefinitionasset for the current project. This tells the platform which project is running and is used to configure the scene during startup.
Now assign your newly create ProjectDefinition to the AppConfig behaviour on the AppConfig object.

That's it! You're all set up.